Python programming multi-platform TI-84 / desktop

PHP – Hyperlinks – Course

In this course we will build a database to store your hyperlinks.
Before we start, you can have an idea:
Hyperlinks search – TAGGER.biz

What you’ll learn in the first course

  • How to design a program that runs on many devices (cellphone/tablet/Mac/PC)
  • How to make a database design
    relational database, how to work with indices, autoincrement
  • Steps to design a robust program
  • Programming of webservices (restful webservices with JSON)
  • Programming of PHP client (a GUI graphical user interface)

Next steps

  • Programming of Kotlin client with TornadoFX as an example how to separate server from client logic
  • Programming of Kotlin Compose Client for android and iphone

Windows 11 – Bluetooth devices in power mode

If you have any problems with your Bluetooth Keyboard or mouse: try to change the behavior in power mode:

Go to Control Panel / Hardware and Sound / Devices and Printers
Go to Your Keyboard

I’ve found some hints here, but they’re only partially useful:
https://answers.microsoft.com/en-us/windows/forum/all/windows-10-bluetooth-always-on/2aa8b7a5-ffb9-4637-9352-00388a1f73fb

Python – reading Outlook mails

Github

Project https://github.com/edleijnse/mailReader

In this project you’ll find a sample how to read items from Outlook, select some of them and save attachments to a directory. The filenames of the attachments are changed: there will be a receivement date added as a prefix to the filename

import win32com.client
import os
from datetime import datetime, timedelta

# Press Shift+F10 to execute it or replace it with your code.
# Press Double Shift to search everywhere for classes, files, tool windows, actions, and settings.


def extract_attachments(mailbox, restrictMessage, outputDir):
    # Use a breakpoint in the code line below to debug your script.
    print(f'Mailbox: {mailbox}')  # Press Ctrl+F8 to toggle the breakpoint.
    outlook = win32com.client.Dispatch('outlook.application')
    mapi = outlook.GetNamespace("MAPI")

    for root in mapi.Folders:
        try:
          if (mailbox in root.FolderPath):
             print ("FolderPath: " + root.FolderPath)
             for folder in root.Folders:
                 print("folder: " + folder.FolderPath)
                 messages = folder.Items
                 restrictedMessages = messages.Restrict(restrictMessage)
                 for message in list(restrictedMessages):
                    received = str(message.ReceivedTime)
                    print (message.SenderEmailAddress)
                    print (received[0:10])
                    receivedString = received[0:10] + "_"
                    for attachment in message.Attachments:
                       attachment.SaveASFile(os.path.join(outputDir, receivedString + attachment.FileName))
                       print(f"attachment {receivedString +  attachment.FileName}  saved")

        except:
            print("exception")

# Press the green button in the gutter to run the script.
if __name__ == '__main__':
    outputDir = r"f:\swissedu_attachments"
    extract_attachments('ed@leijnse.info', "[SenderEmailAddress] = 'helena.dimi@windowslive.com'", outputDir)

# See PyCharm help at https://www.jetbrains.com/help/pycharm/

Python – read Word documents

Project: https://github.com/edleijnse/wordDocumentReader

In this Python script you’ll find a sample how to traverse a directory with subdirectories, select Word document, extract the texts and make a new document file. At the end 2 summaries will be added: one with all the words and frequencies and another with the frequencies and words.

Sample “frequency / word”

37 we
38 about
38 from
38 this
39 B
39 C
39 D
39 YOUR
39 make
39 very
40 been
40 do
41 use
43 can
43 so
49 He
49 an
50 money

# This is a sample Python script.
from docx2python import docx2python
from collections import Counter

import os
import pandas as pd

# Press Shift+F10 to execute it or replace it with your code.
# Press Double Shift to search everywhere for classes, files, tool windows, actions, and settings.

def extract_words(filename, outputFile):
    print("---------------------------------------------------------------------------")
    outputFile.write("\n------------------------------------------------------------------------------------------------\n")
    print(filename)
    outputFile.write(filename+"\n")
    print("---------------------------------------------------------------------------")
    outputFile.write("------------------------------------------------------------------------------------------------\n")
    doc_result = docx2python(filename).text
    print(doc_result)
    outputFile.writelines(doc_result)


    # extract words in a table
    res = doc_result.split()
    return res
def print_tallied(sorted_tallied, outputFile, title):
    #print(sorted_tallied)
    outputFile.write(
        "\n----------------------------------------------------------------------------------------------\n")
    outputFile.write(title)
    outputFile.write(
        "\n----------------------------------------------------------------------------------------------\n")
    ii = 0
    for item in sorted_tallied:
        if (item[1]>0):
           if (item[0].isalpha()):
              print(str(item[0]) + ":" + str(item[1]))
              outputFile.write(str(item[0]) + ":" + str(item[1]) + "\n")
              ii = ii + 1
    print("total: " + str(ii))

    outputFile.write("total: " + str(ii))

def sort_panda(tallied, outputFile):
    outputFile.write(
        "\n----------------------------------------------------------------------------------------------\n")
    outputFile.write("summary words by frequency")
    outputFile.write(
        "\n----------------------------------------------------------------------------------------------\n")

    ii = 0
    wordTab = []
    countTab = []

    for item in tallied:
        if (item[1] > 0):
            if (item[0].isalpha()):
                wordTab.append(item[0])
                countTab.append(item[1])
                print(str(item[0]) + ":" + str(item[1]))
                ii = ii + 1
    data = {'Count': countTab, 'Word': wordTab}
    df = pd.DataFrame(data, columns=['Count', 'Word'])
    df.sort_values(by=['Count','Word'], inplace=True)
    for oneValue in df.values:
        print(str(oneValue[0]) + " " + oneValue[1])
        outputFile.write(str(oneValue[0]) + " " + oneValue[1] + "\n")

def word_document_reader(inputDir, outputFile):
    # Use a breakpoint in the code line below to debug your script.
    print(f'Hi, {inputDir}')  # Press Ctrl+F8 to toggle the breakpoint.
    import os

    total_res = []
    for path, currentDirectory, files in os.walk(inputDir):
        for file in files:
            filename = os.path.join(path, file)
            if ("doc" in filename):
                total_res = total_res + extract_words(filename, outputFile)
    tallied = Counter(total_res)
    sorted_tallied = sorted(tallied.items())
    print_tallied(sorted_tallied, outputFile, "summary of words")
    sort_panda(tallied.items(),outputFile)

# Press the green button in the gutter to run the script.
if __name__ == '__main__':
    inputDir = r"f:\swissedu_attachments"
    outputFile = open(r"f:\swissedu.txt", "w", encoding="utf-8")


    word_document_reader(inputDir, outputFile)

    outputFile.close()

# See PyCharm help at https://www.jetbrains.com/help/pycharm/

WordPress – Webshop with Ninja Forms and NF Views

If you want to have a flexible Webshop where the shop owner can add easily products / payments: then read this post!

I’ll explain two different kind of solutions. The first solution uses Ninja Forms and NF Views, the second solution uses Envira Galleries and Stripe.

Some background information

I was looking for a possibility to use the integrated WordPress database as a data store and I came up with the following idea. I use Ninja Forms as a form builder. Ninja Forms stores all the submitted data in the WordPress database and you can view it in “submissions”: quite comfortable for a start.
But: I wanted more! I thought: wouldn’t it be possible to use this “submission” data store and build on top of it: first, some data views, later maybe reports as well.
I was looking for plugins that could possible help me to solve this problem, and then I found “nf views”, https://nfviews.com/ It’s a very nice solution, the drawback could be the price (if you want to have the complete solution with the possibilty to edit the data as well, it will cost you around 200 USD on a yearly base) But: it saves you a lot of time, so, finally I leased this plugin and so far I’m very happy with the plugin. You always have to consider, even as a private programmer, what is cheaper in the end: make or buy. Buying can save you a lot of headaches. And, if you work with WordPress and plugins: you are the owner/data provider: it comes with responsability but also with freedom: you are not dependent on Cloud providers like Microsoft or Amazon. And, if you have a reliable provider like I do (Webland in Switzerland), it makes a lot of fun to build solutions with WordPress.

Webshop with configurable products

In this solution the webowner can easily add or modify products.
You need to be an admin to configure the products.

Products overview
product image
payment with Stripe (VISA / Paypall)

Windowing Techniques for Windows

https://uk.pcmag.com/migrated-3765-windows-10/87827/how-to-organize-your-desktop-with-windows-10-snap-assist

The most simple way to move windows to the right or left side (or middle):
Windows-Key + Arrow-Key (Left, Right, Up, Down)

If you want to switch the desktop:
Windows-Key + CTL + Arrow-Key

It’s also possible to switch desktop while using the task liste, e.g.:


Windowing techniques for MAC

https://support.apple.com/et-ee/guide/mac-help/mchlp2469/mac

Copied form Apple support above:

Move a window to one side of the screen: Press and hold the Option key while you move the pointer over the green button 

 in the top-left corner of the window, then choose Move Window to Left Side of Screen or Move Window to Right Side of Screen from the menu that appears. The window fills that half of the screen; the menu bar and Dock remain visible.

Remote Access from Mac to Windows

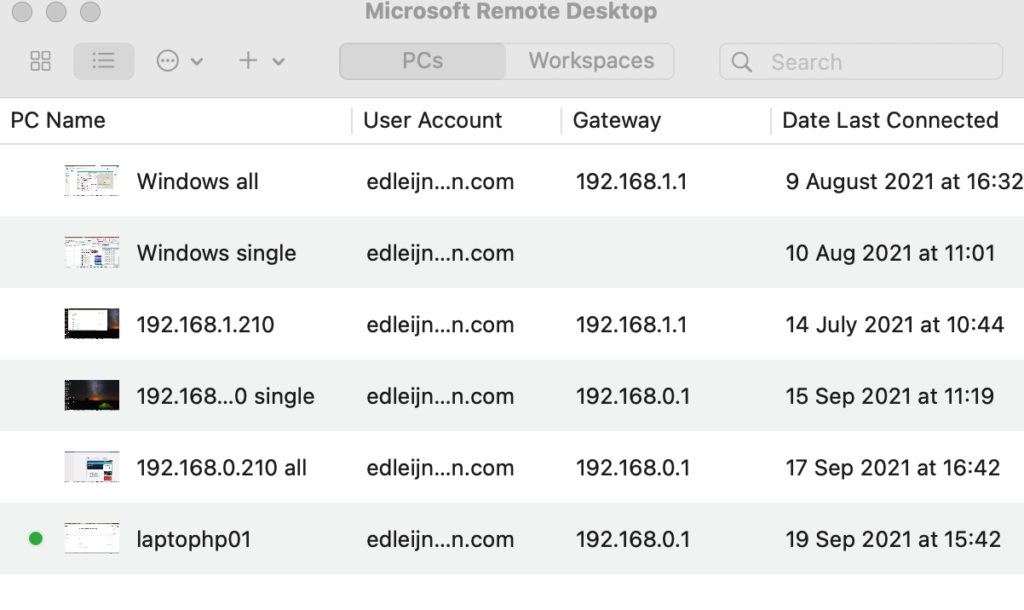
If you want to access your Windows PC (or Laptop) you can use software from Microsoft (Microsoft remote access). Here are the steps how you can do that.

On the MAC: got to your Appstore, search for “Microsoft remote desktop” and install it (it’s free)

On your Windows system: got to Settings and “enable remote Desktop”

After enabling you can add your Windows system to Microsoft Remote Desktop on your Mac. It’s even possible to work with 2 Monitors. It is very fast!

Remote Access from Windows to Mac and vice versa

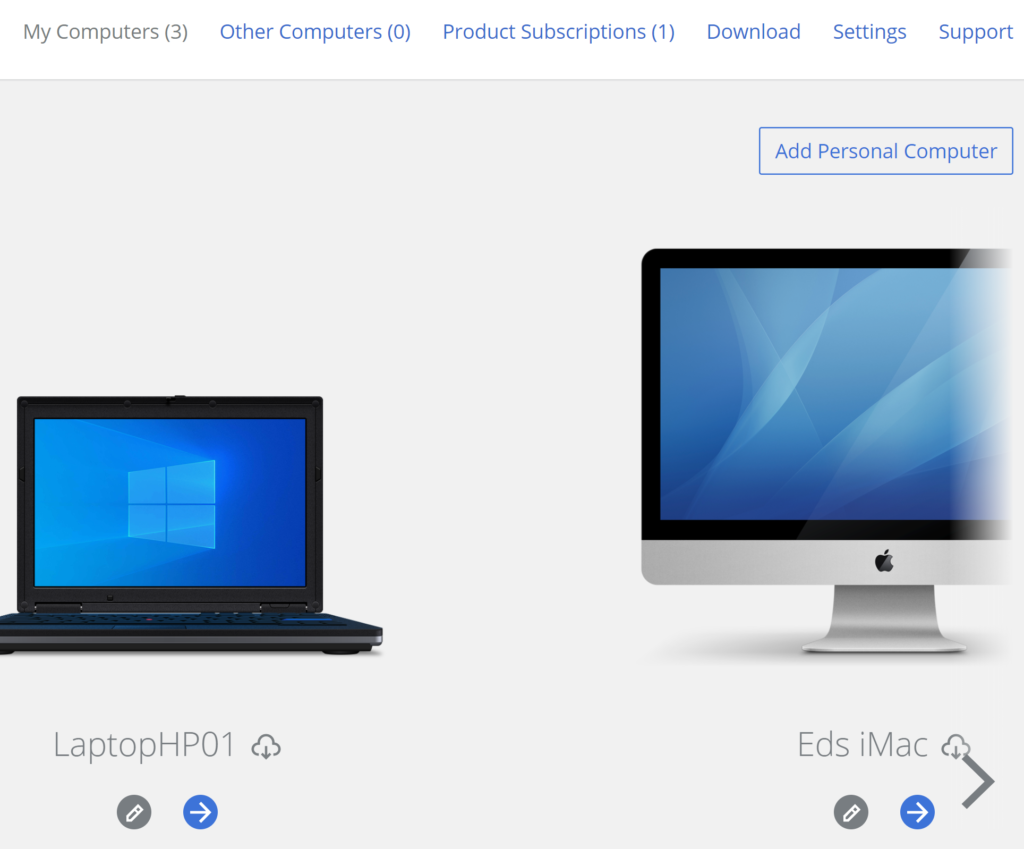
The easiest way to realize a remote access from your Windows PC (or even a Tablet) to your Mac offers Parallels.com: https://www.parallels.com/products/access/

It is an affordable solution: $19 a year. If you already subscribed Parallels on your Mac, you’ll get this in your package (Parallels, Parallel Tools, Parallel access)

It works like this: you’ll have to install additional software on your Mac to make this happen.
If you want to access your Windows PC from your Mac: there’s also additional software for Windows.

It works with your Parallels account: so it should also work when you’re not at home (I’ve not tested this option)

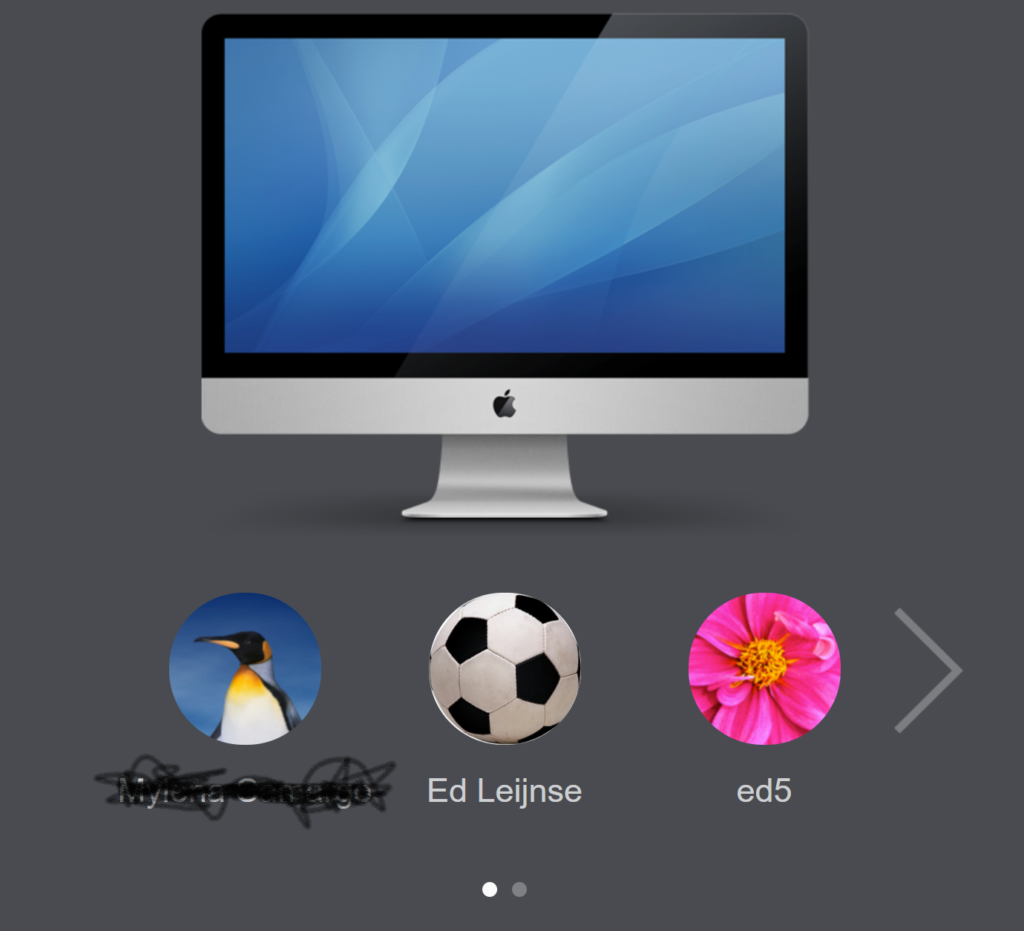
After logging in with your parallels account, you can simply start the connection

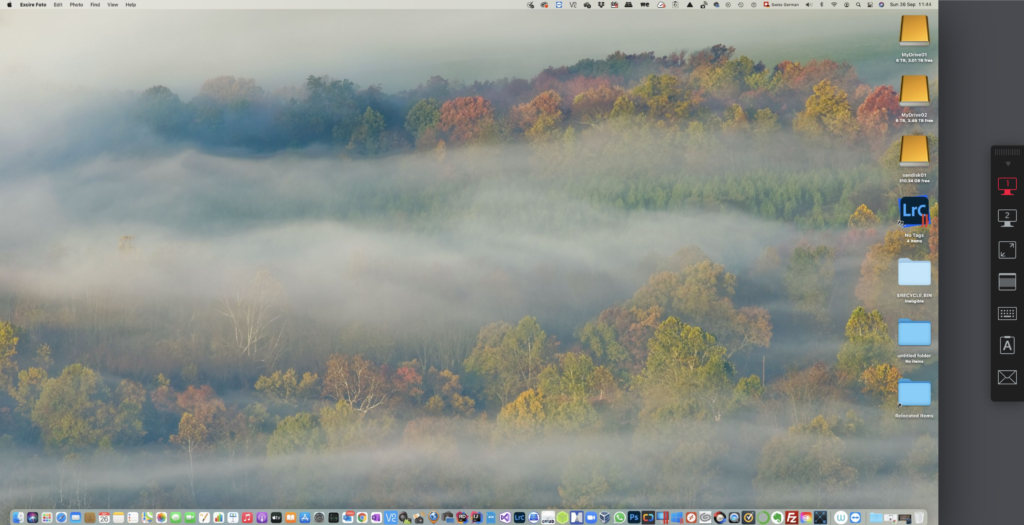
After you’re logged in you can use your Mac on your Windows PC

It’s even possible to work in full screen mode.

TI-84 Python development sample

Preparation (optional)


Get sample code from GITHUB here

Open Pycharm (or another editor) and create a project from the GITHUB link
Tip: close all projects first

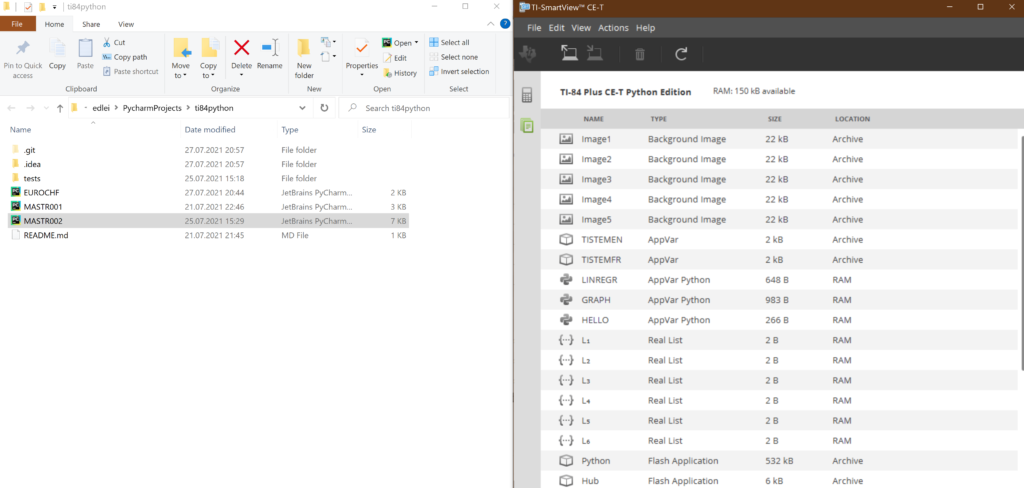
There are 2 files for the mastermind project: MASTR002.PY and test\MASTR002.py
The one in test\ is used for unit tests

Install the emulator software, see howto here

Deploying a .py file on the TI-emulator

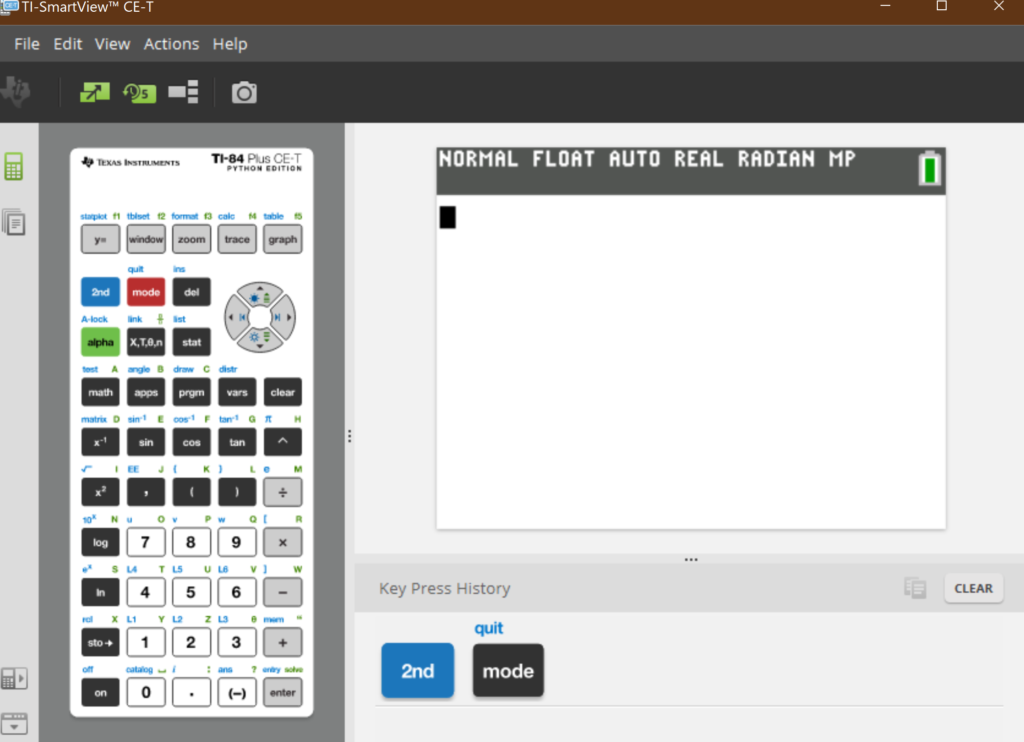
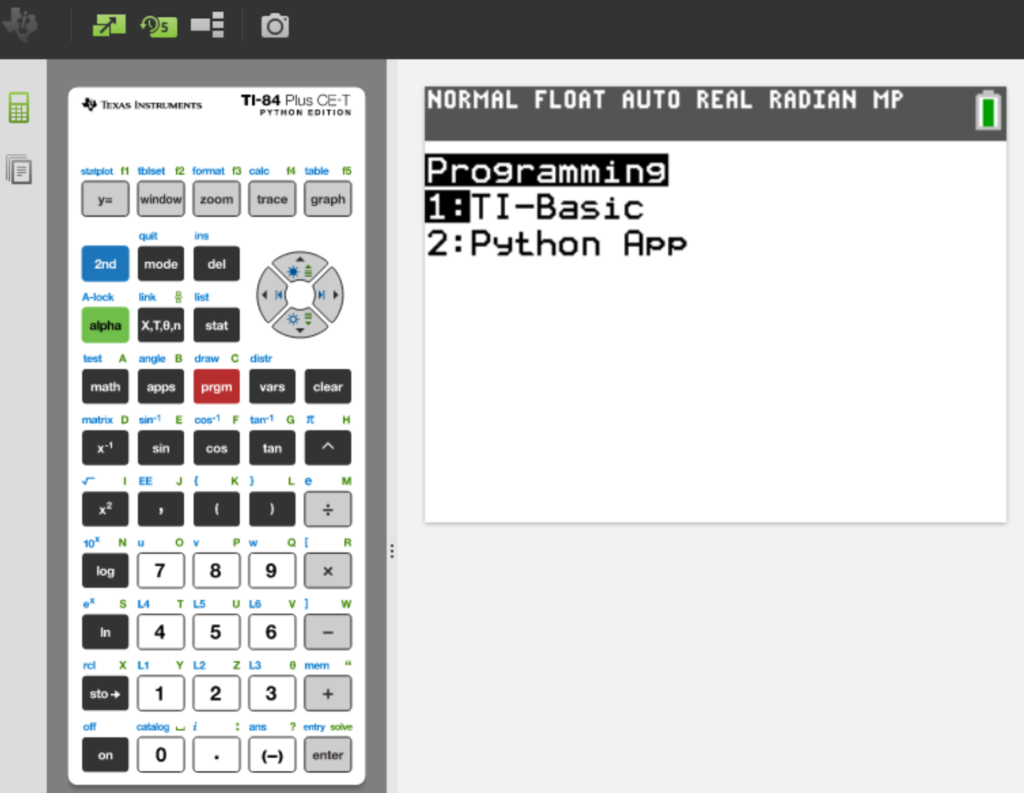
Start the TI-Smartview emulator

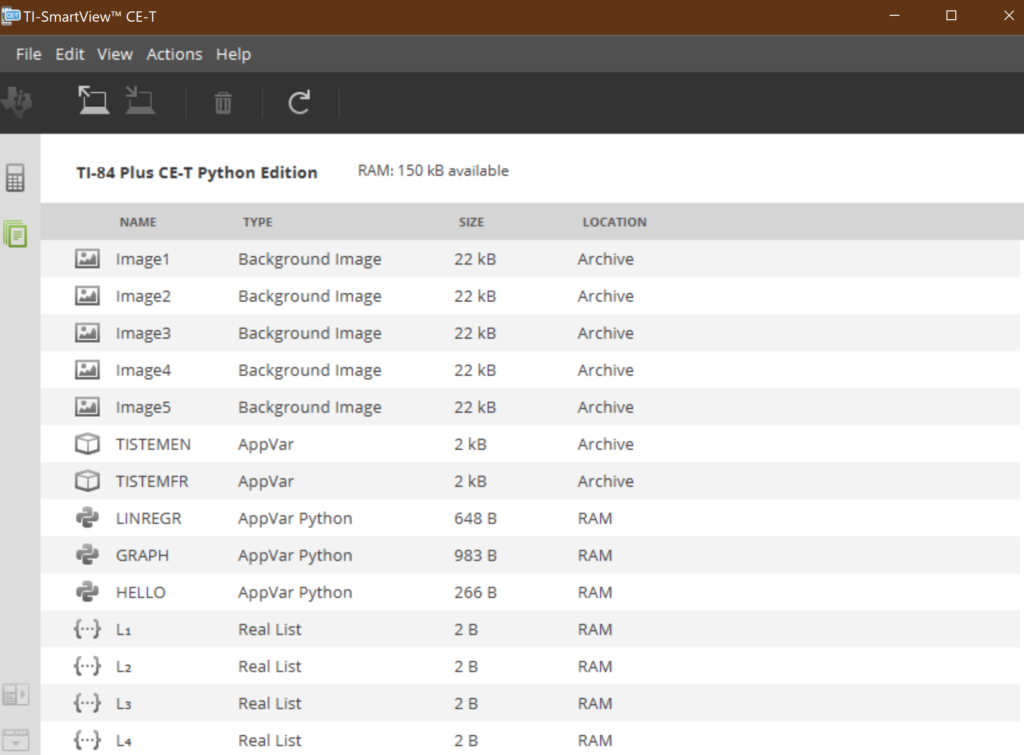
Get the contents

Now you can copy the file MASTR002.PY to the emulator with drag and drop:

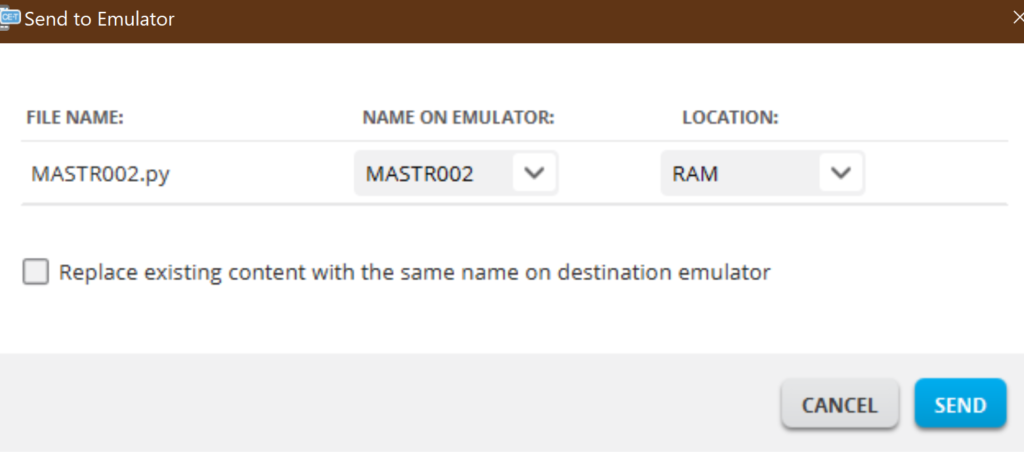
You’ll get the following dialog box:

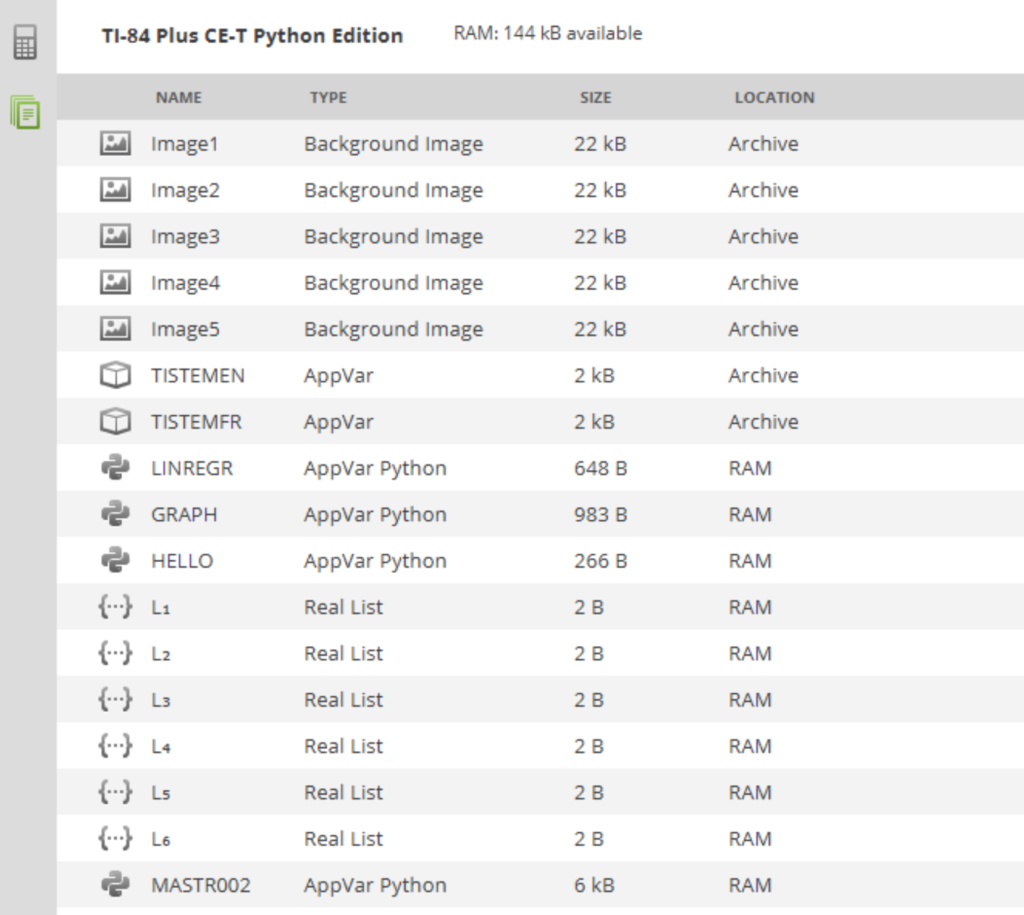
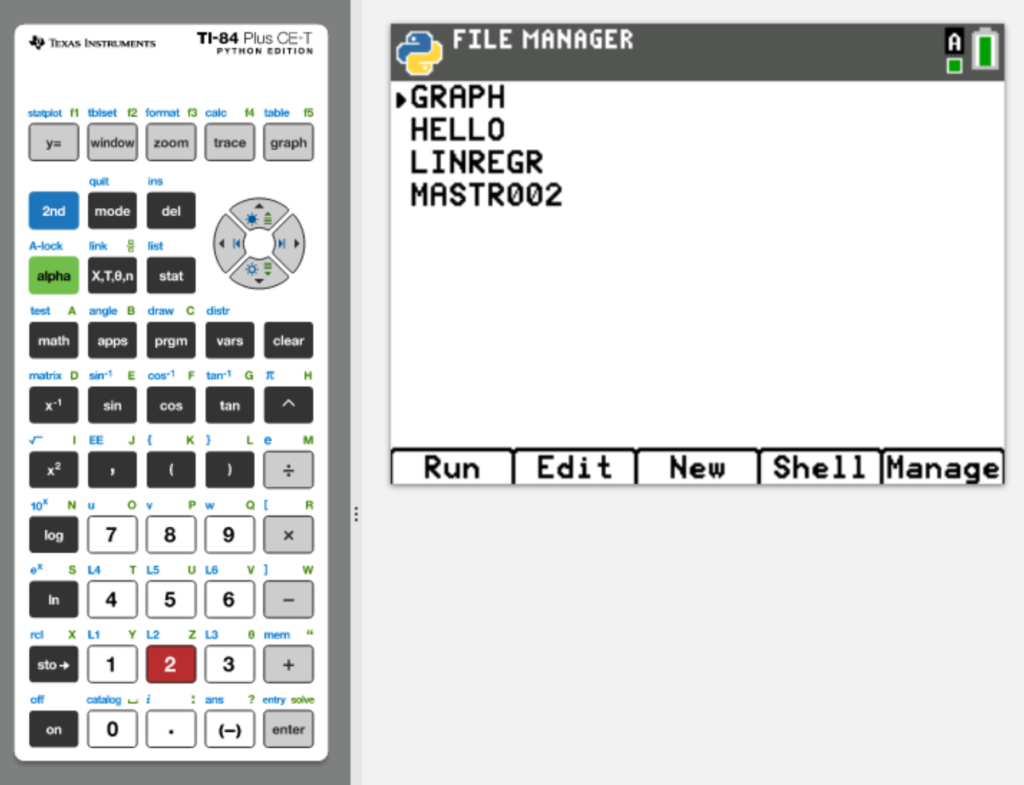
Now the MASTR002.PY is listed and ready to run

Now you can run MASTR002 on the TI-emulator

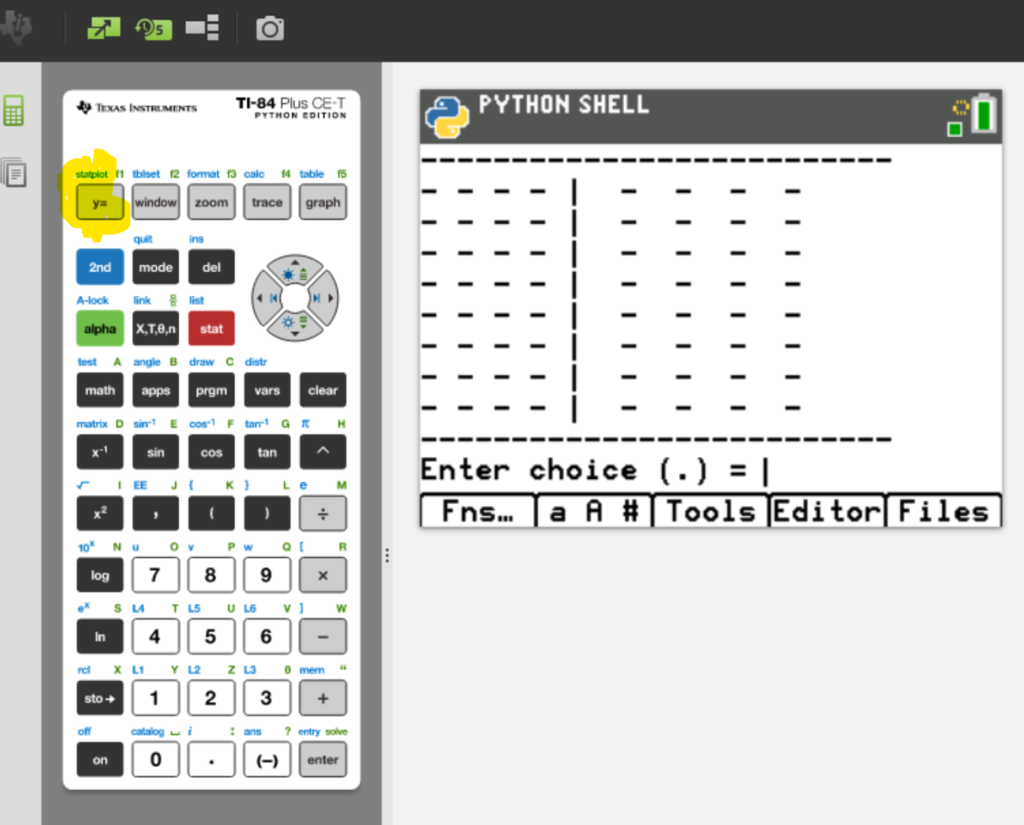
To run the program, click on Y=

Now you can play the game as long as you want!

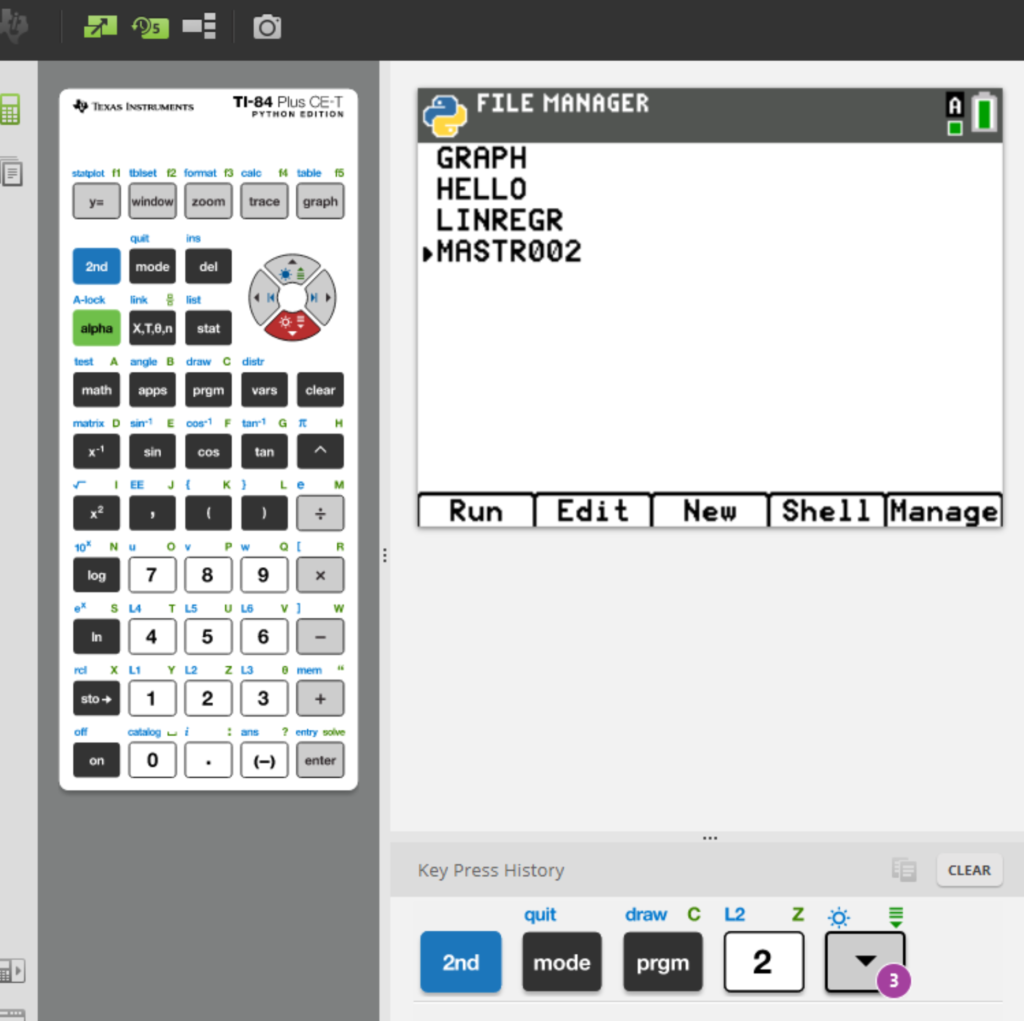
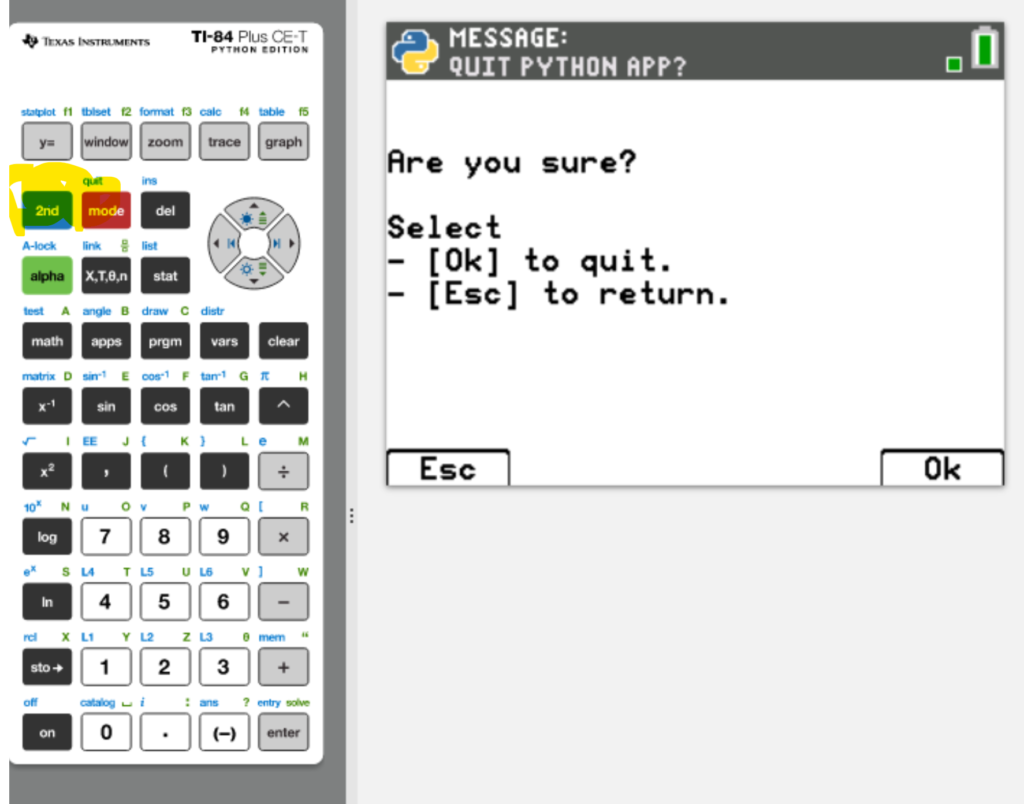
After ending the game you can click 2nd quit

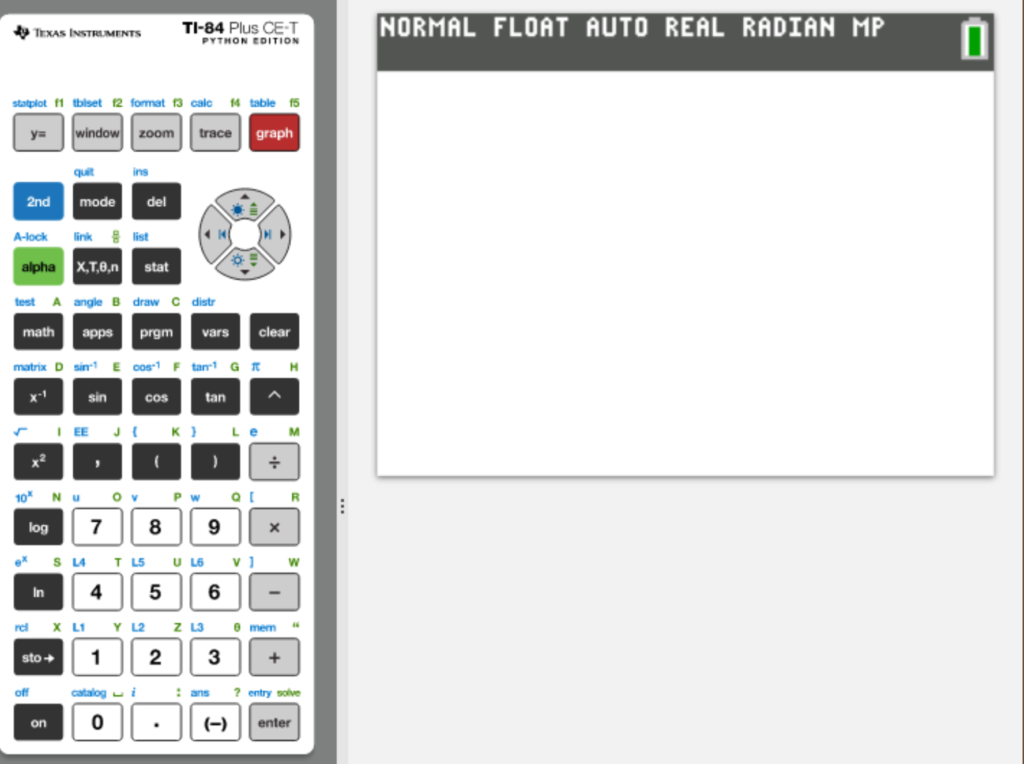
and then GRAPH (red below)