Chat with ChatGPT – GPT4
CHAT
Generate a QR CODE
QR CODE
Learn about colors
colors (tagger.biz)
Emergency and Tools
Status Facebook, Messenger, Instagram, Google
https://downdetector.com/
Status all websites
Check If Website Down – Website Status & Downtime Checker Tool
Speedtest
Speedtest by Ookla – The Global Broadband Speed Test
Speedometer Benchmark for Browsing
Speedometer 3 (browserbench.org)
GENERATE AN IMAGE BY TEXT: DALL·E Now Available Without Waitlist
CHAT GPT GENERAL INFO
LATEST POSTS
- Synchronizing with Lightroom
- Tag your images with Office for free
- CHATGPT and YOU.COM
- Generate an image by description
- ChatGPT Client – User manual
Hyperlinks
We’ve collected many useful links concerning culture (museum), Windows, video, Linux.
If you’re curious have a look at:
search on Taggerbiz

Helping you with solving your problems in programming and finding the right sources (even in tourism!)
I (Ed Leijnse) started TAGGER.biz with the intention to offer software for tagging of images. You can read the whole story below (History).
Now this site is meant to help you in common problems, like searching for Hyperlinks or programming in WordPress, Python or PHP.
If you have any questions: I’ll be glad to help you! Simply leave a comment, I will read it and give you an answer. If the question is of common interest, of course I’ll publish it.
WordPress tips
Instead of programming everything all by myself, I’ve started to take WordPress more seriously. You can see some of the results in https://hobbyt.ch
I’ve found out some cool tricks to build a configurable Webshop.
Trade off: you have to use some plugins (and you have to pay for them!):
ninjaforms, nf views, themes (Weston), envira galleries: it adds up to CHF 500 a year if you want/use them all. But, you’ll be surprised with the results, so I’ll tell you anyhow.
See: category WordPress.
Motivation
I’ve refactored TAGGER.biz in a blog with programming tips and tips for making your workplace as comfortable as can be (remote access from your Mac to your PC and vice versa).
About programming: the idea is to keep things simple (KISS – keep it simple stupid – this philosophy made IBM big one time, remember Big Blue?)
The first series is about how to program a famous calculator, the TI-84 from Texas Instruments. I’ll show you how to develop small python utilities that are multi-platform (you can run them on a desktop or on a TI-84 Python edition)
If you have any wishes for future blog-items: please let me know, the simplest way is to leave a comment on a blog post.
Have fun and take care!
Mr. Ed
History
We’ve developed software to tag images using Cloud services from Google and Microsoft.
We were confident and enthusiastic about the product and spent many hours developing the system: Thank you, Elena Dimitriou, Julian Georgiou, Cesar Martins, Mylena Camargo, for your never-ending support. We learned a lot and had a lot of fun working together.
But, remember the famous Rolling Stones song: “You can’t always get what you want”.
Probably because of the complexity of the process we don’t have enough customers to carry on with the development of the system. And, besides that, we’ve found out there’s a competitor that works easier, better and much cheaper. It’s a german based AI company called PRC, pattern recognition company with a product called “Excire”.
Excire is cheap (under €100), runs locally on your computer, has it’s own databases, and even has a plugin for Lightroom. We’ve tested this product and we can recommend this product.
What we’re still offering
We will offer you support if you have any questions regarding tagging of images or organizing your data locally or in the cloud (DropBox or OneDrive). We can help agencies to work fluently with images and tagging all over the world, that’s our business, you can ask your questions here.
WHAT TAGGER.biz did
TAGGER.biz adds keywords to images. Default language is English, other languages as an option.
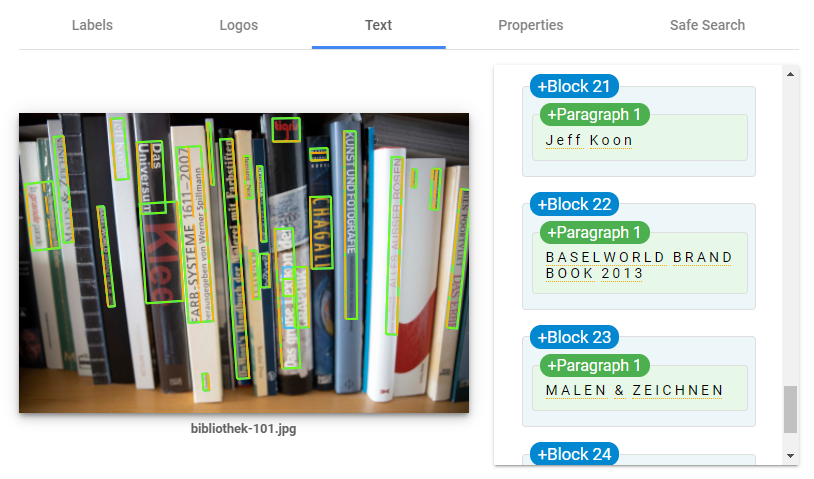
You’ll be surpised what we can do for you: take a look here: you’ll get your keywords from “Microsoft Vision all keywords” categorized with a confidence level to make it easy to narrow down your selection (0_ low level recognition, 9_ best recognition). You can decide if you want simple keywording of JPG images. Or if you prefer to have your RAW files tagged. Details here.
Our customers have mostly different needs. But they all need keywords. TAGGER.biz helps them.
Elena is a hard working, talented and young photographer, who’s interested in doing her job perfectly. She wants everything that’s not essential for her creativity to be done as quickly as possible, no tech stuff!

Elena explains..
I have a great deal of photos and collections in Lightroom and I used to find it extremely hard to find that one particular photo I was looking for.
With TAGGER.biz, I realized that there’s an easy way to add keywords (tags) to my image collections in Lightroom. I can now find the photo(s) I’m interested in instantly!
The best thing about TAGGER.biz is that it’s incredibly simple to use:
I can generate all keywords for one collection in a single TAGGER.biz run, all I have to do is click on “start”!
Working with keywords in Lightroom:


Ed explains...
I always wanted to develop this product. I started with it 2 years ago.
After my retirement in November 2019 I could really concentrate me on TAGGER.biz: image-recognition in big collections. After many years of digital photography I’ve produced a large collection of untagged images: it was a chaos, not possible to find anything.
So, after one year of hard work, together with the support of Elena (KISS: keep it simple stupid) and Cesar (Lightroom requirements), we can now present you:
____________________________________________________________________________________
What is TAGGER.biz?
If you’re not yet familiar with keywording, take a look in the Glossary
TAGGER.biz is a system that adds keywords to images. The images can have different kinds of formats (jpg, dng, raw format). TAGGER.biz directly changes the original images: there’s no need to reimport them in Lightroom.
- supports Lightroom?
YES
Multiple harddrives NOT supported in the standard version of TAGGER.biz (available as option) - supports other image collection systems like Darktable?
YES, same restrictions as Lightroom - multilingual?
YES! Available since January 10th 2020. All languages supported because of Google translate.
ASK for OFFER MULTILINGUAL: support@tagger.biz - Windows?
YES - Mac?
YES (BETA Version January 10th 2020) - Linux?
NO
______________________________________________________________________________________
Why you need TAGGER.biz?


___________________________________________________________________________________
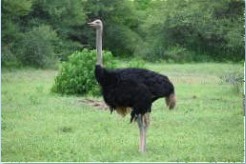
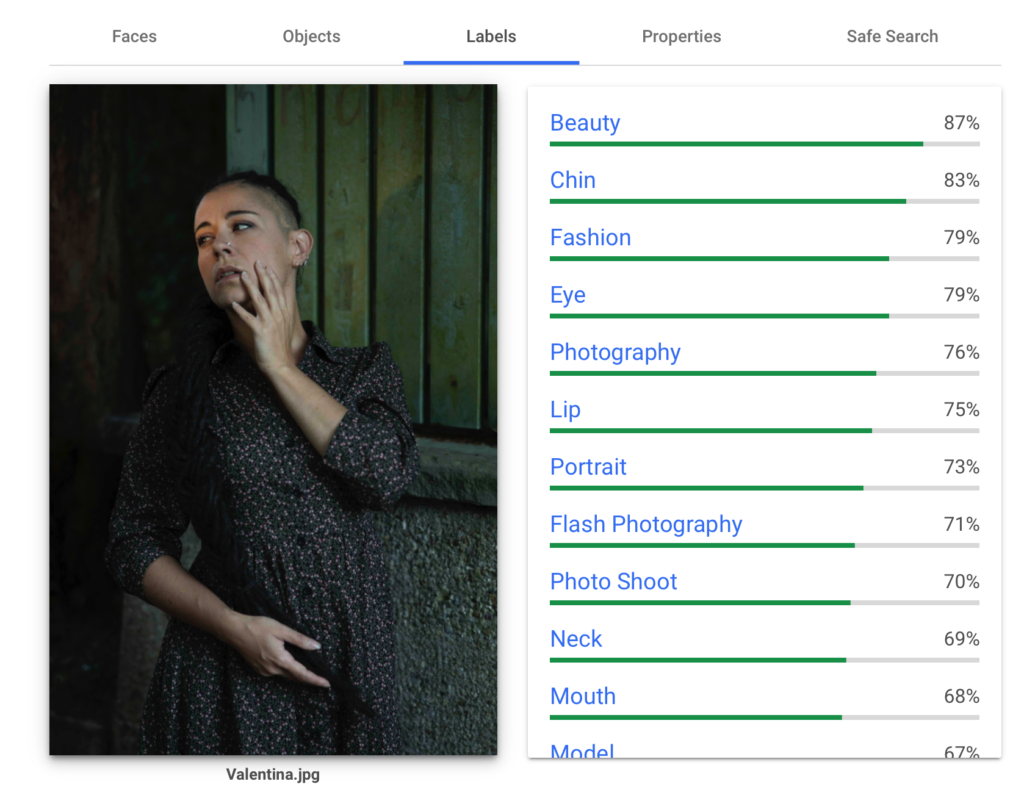
An example of Keywording – MyKeyworder.Com, Microsoft Vision and Google Vision AI
Keywording samples from providers:

_________________________________________________________________________________
Packages and how to order
If you decide to work with TAGGER.BIZ, click here