If you want to have a better performance on your remote client, use realVNC Works like a charm, but you have to pay a subscription if you want to use it outdoors
Programming with JavaFX To run JavaFX on a Raspberry Pi 5, install OpenJDK and OpenJFX, then create and launch your JavaFX application using standard Java commands. sudo apt install snapd sudo reboot sudo snap install openjfx
Use Docker for having a webserver at home sudo curl -fsSL https://get.docker.com -o get-docker.sh sudo less get-docker.sh sudo sh get-docker.sh Recommendable reading: Docker – das Praxisbuch für Entwickler und DevOps-Teams, Bernd Öggi, Michael Kofler
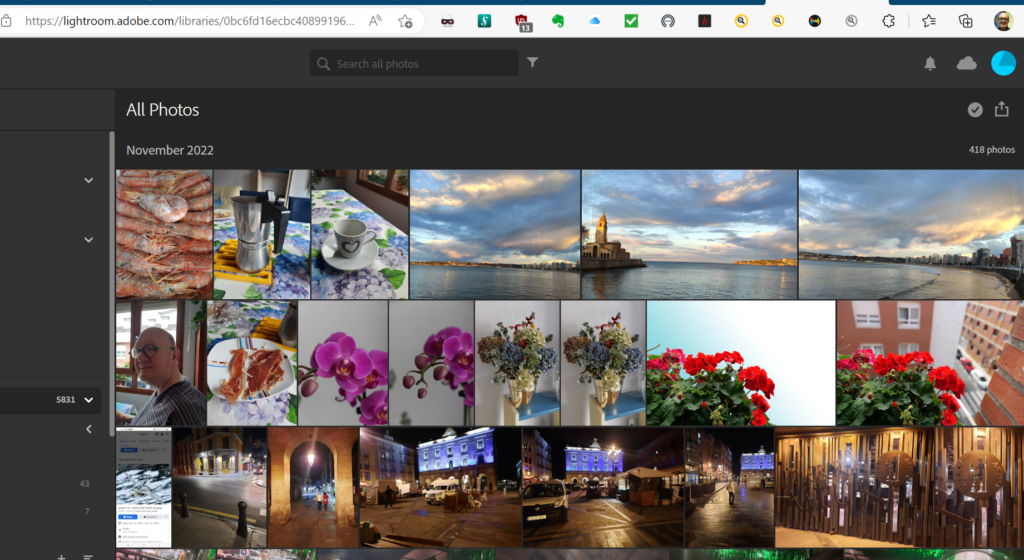
Synchronize between Lightroom Web and Lightroom Classic
If you have questions about how to import from Lightroom Web to Lightroom Classic: here is a link to Adobe’s FAQ. Important: you can only synchronize with one catalog at the same time because the sync history is saved in the cloud. If you have to start with a new laptop, it’s best to start with an empty catalog and then configure the syncing from scratch: you will be asked if you want to replace the former catalog data.
Lightroom Classic: Synchronizing between 2 PC’s
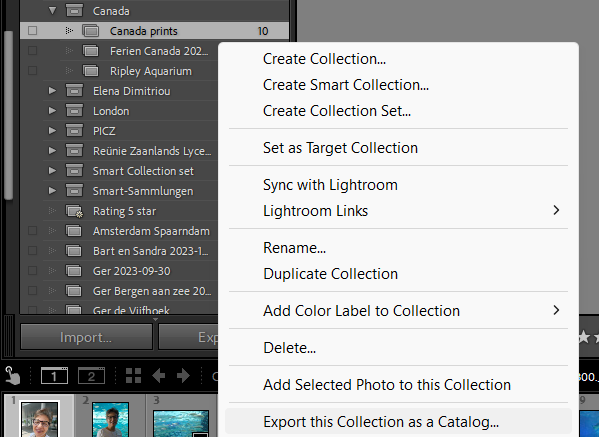
For all people who still work with Lightroom Classic, installed on more than one device (PC, Laptop, Ipad or Android device): We all have this problem: you’re on Holidays, process your photos on a laptop. You’re coming home, how can you import the processed photos on your main computer. The answer: work with exporting part of your catalog (right click on a collection),
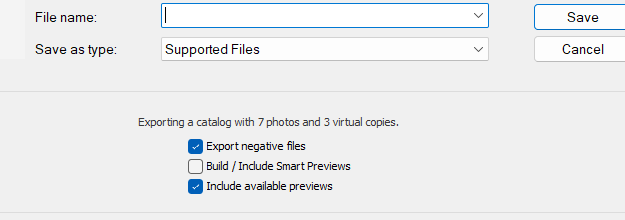
Demo video
The video demonstrates exporting parts of a catalog (Gijon photos) and importing them later on another PC/Laptop with another Lightroom CC installed. It shows you what you have to consider while importing. If you want to try it yourself: start practising with a very small collection of 10 photos. Success!
How to synchronize in text Below you find the same item described in text form, this time a collection named “Canada prints” is exported and imported.
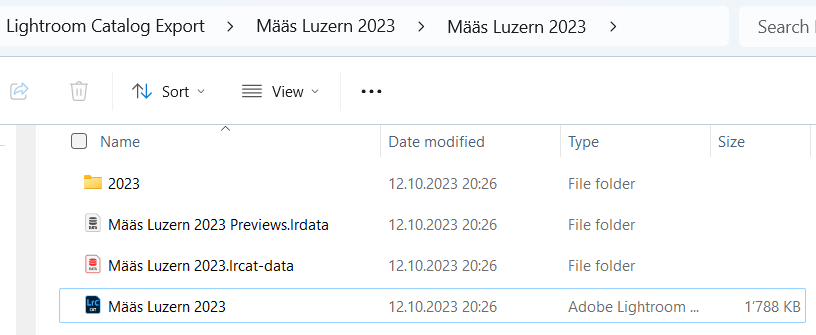
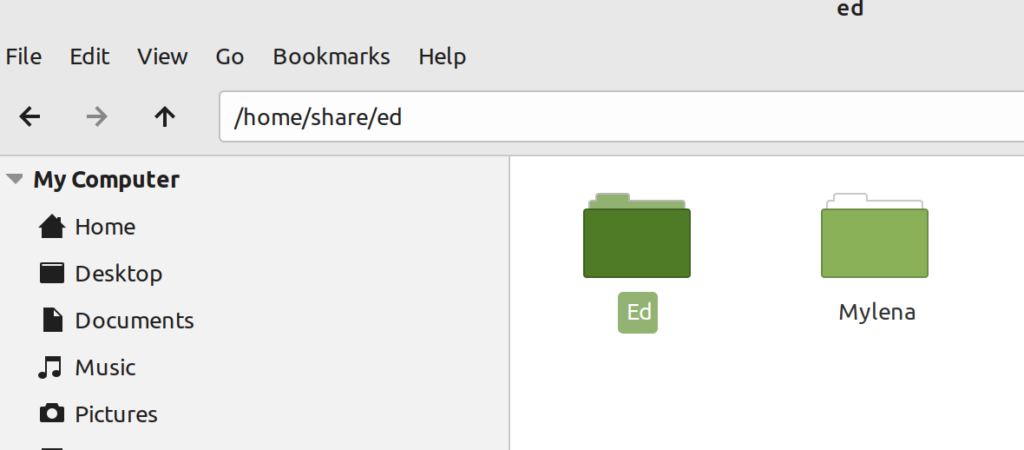
after exporting your folder looks like this:
The photos are stored separately from the catalog (in the sample: 2023) Now it’s possible to import this catalog part into another PC.
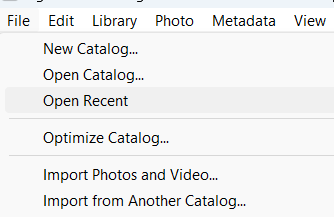
Choose file, Import from Another Catalog
A new dialog appears, make sure that your new photos are stored in your Lightroom folder, it could be another folder as used in your laptop.
Tip: practise first with only a few photos (10), to make sure everything works as expected.
But, there are other competitors as well. Have a look at YOU.COMhttps://you.com
The main advantage of you.com is, that it works as normal search engine like Google. However, you can chat with it and it will display the sources too: one of the main critical points of CHATGPT.
I made this painting myself (it’s a real oil painting).
Afterwards I decided to generate a painting/image by description, this what came out: Text: “A photo of 3 sunflowers in a realistic style with some impressionistic effects. Below the sunflowers you can see about 5 leaves. The image must have mainly orange, yellow and violet colors”
“A painting of 3 sunflowers in the style of Van Gogh. Below the sunflowers you can see about 5 leaves. The image must have mainly orange and yellow colors, mixed with green and a little bit violet.”
With this client you can communicate with the OpenAI Chatbot. Chat GPT is a very advanced chatbot, becoming very popular since the release in November 2022. If needed, you can get some help to ask for summaries and translations.
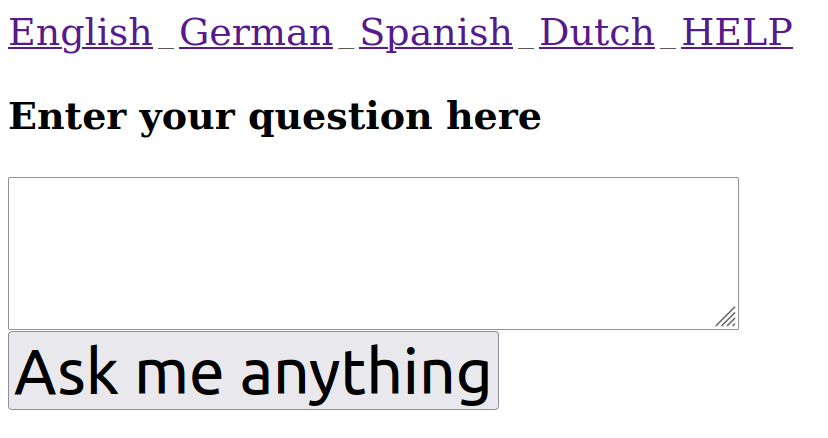
On the first screen you can already work: it’s quite simple: enter your question in the text field and click on “Ask me anything”. As an example I’ll ask: “Tell me all about Chat GPT and it’s company” I got this answer:
“Chat GPT is a fully automated conversational AI platform company that enables digital enterprises to automate and manage their conversations with customers.
Chat GPT provides digital platforms with an AI enabler that enable businesses to improve customer engagement and enable better customer service across multiple channels, such as SMS, web, in-app, and other touchpoints.
The platform utilizes a conversation automation system, which works with Natural Language Processing (NLP) and Machine Learning (ML) to support businesses in deploying automated conversations.
The platform is capable of learning from customer conversations and analyzing the data to identify customer preferences, interests, and provide them with personalized experiences. The platform helps drive automated dialogues and provide insights into customer engagement.
Chat GPT also provides customers with a comprehensive set of tools and services designed to optimize their customer experience as they build an AI-driven digital customer engagement. These services include automatic customer segmentation, AI-Powered analytics, performance optimization, automated customer support, and many more.
Chat GPT was founded in December 2019 and is a venture-backed tech startup with offices in two locations: San Francisco and New York.”
Amazing, isn’t it? If you want to know more about the company: https://chatgpt.pro/ and if you want to chat with the GUI they offer (you have to register): https://chat.openai.com/
Customized versions of the Client Chatbot in English, German, Spanish and Dutch
Sometimes it’s helpful to have some samples if you want repeating tasks like translations, corrections or summaries. That’s why I’ve made some special clients for German, English, Dutch and Spanish. Here is an example for the English option:
I’ve asked for a translation in German, this is what I get:
“Chat GPT ist ein vollautomatisiertes plattformbasiertes Unternehmen für Konversations-KI, das digitalen Unternehmen ermöglicht, ihre Konversationen mit Kunden zu automatisieren und zu verwalten. Das Platform bietet digitalen Plattformen einen KI-Enabler, mit dem Unternehmen die Kundenbetreuung verbessern und einen besseren Kundendienst über mehrere Kanäle wie SMS, Web, In-App und andere Kontaktpunkte bieten können. Die Plattform nutzt ein Konversationsautomatisierungssystem, das mit Natural Language Processing (NLP) und Machine Learning (ML) arbeitet, um Unternehmen bei der Implementierung automatisierter Konversationen zu unterstützen. Die Plattform ist in der Lage, von Kundenkonversationen zu lernen und die Daten zu analysieren, um Kundenpräferenzen, Interessen zu erkennen und ihnen personalisierte Erfahrungen zu bieten. Des Weiteren hilft die Plattform beim Automatisieren von Dialogen und beim Erhalten von Einblicken in den Kundenengagement. Chat GPT bietet Kunden auch einen umfassenden Satz an Tools und Dienstleistungen, die dazu dienen, die Kundenerfahrung zu optimieren, während sie ein KI-getriebenes digitales Kundenengagement aufbauen. Diese Dienste beinhalten automatische Kundensegmentierung, KI-gestützte Analytics, Leistungsoptimierung, automatisierter Kundendienst und vieles mehr. Chat GPT wurde im Dezember 2019 gegründet und ist ein venture backed Tech-Startup mit Büros an zwei Standorten: San Francisco….”
You see that the translation is very good, but in this case not complete (I can extent it if there is a need for it). Have fun! If you have any questions: leave a comment and I will respond.
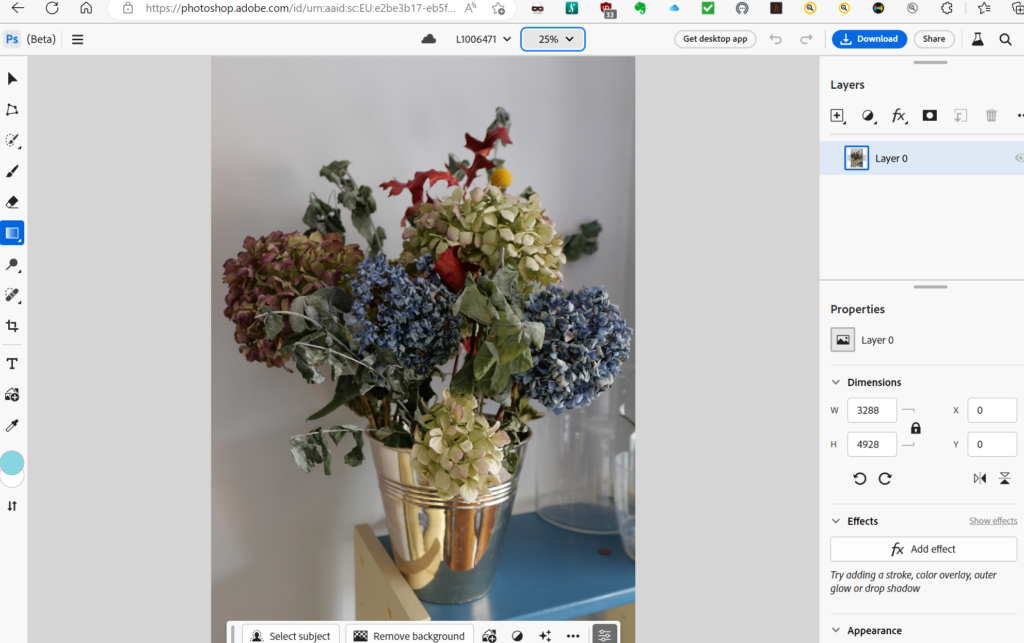
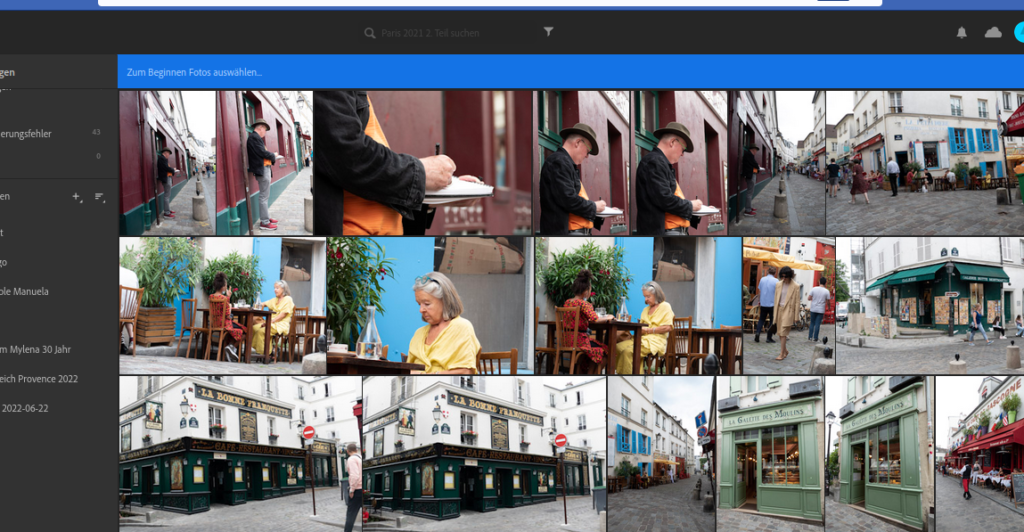
How to use Lightroom and Photoshop without installing, directly as a web-application.
If you’ve subscribed Lightroom and Photoshop you’ve probably noticed that there are also Web versions of them (Photoshop is still in development). You can call them directly from your browser. Lightroom works in Linux too, Photoshop works in Windows or MacOs.If you want to use Photoshop in Linux, you have to install the “Chromium” Browser first. There is also an App version of Lightroom that works on Android or IOS devices. All data will be synchronized! So, you don’t have to worry about your cellphone photos anymore: they will be replicated to the Adobe cloud: The very good thing is: you’ll get 1 Terabyte of Cloud data if you decide to get the option for it (about 20 CHF a Month, Lightroom, Photoshop and a Premium light version included). You can call the Web-Version with these URL’s:
Well, you’ve got an older Mac (IMac or Macbook) that’s getting slower and slower. And: it’s already old (7 years or more). You’ll notice that your MacOs is not supported as it used to be. At the end it’s a real bore to work with your Mac. Now, you can do 2 things: if money isn’t a problem: you can buy a new one. But, if money IS a problem: why don’t you recycle it in a Linux working station? It’s definitely worth the price, it only cost you some time. The process is rather simple:
create a USB stick with a Linux distribution (in my case I used Ubuntu 22.x)
Stick the USB in your Mac, start it with ALT Power on and install it
Download a Linux ISO file and put it on the USB Stick with balena etcher (Search for Ubuntu download)
After the installation you’ll have a full functioning linux system FOR FREE! It supports even printing, scanning, watching movies, you’ll be suprised!
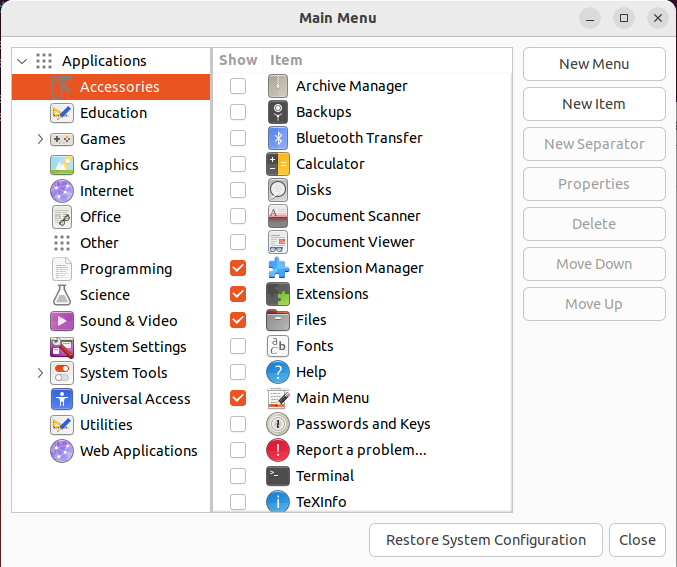
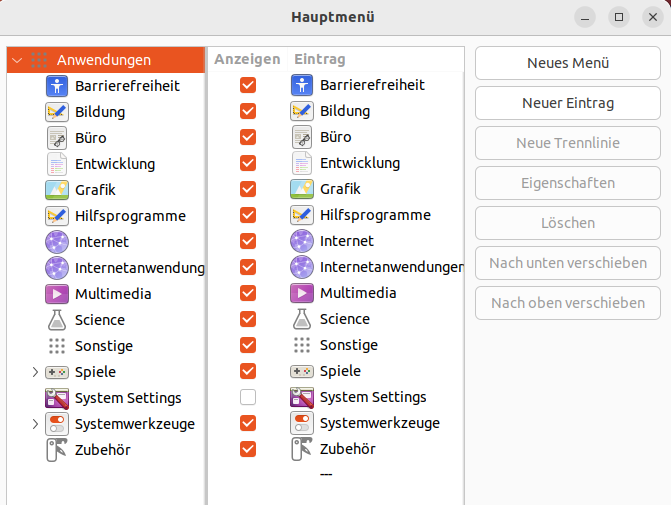
After this initial installation you want to have some comfortable menus. Go to “Ubuntu Software” and look for “alacarte” or “Main Menu” and install it
You can find it now in your installed programs (English main menu, German Hauptmenü) and you can use it
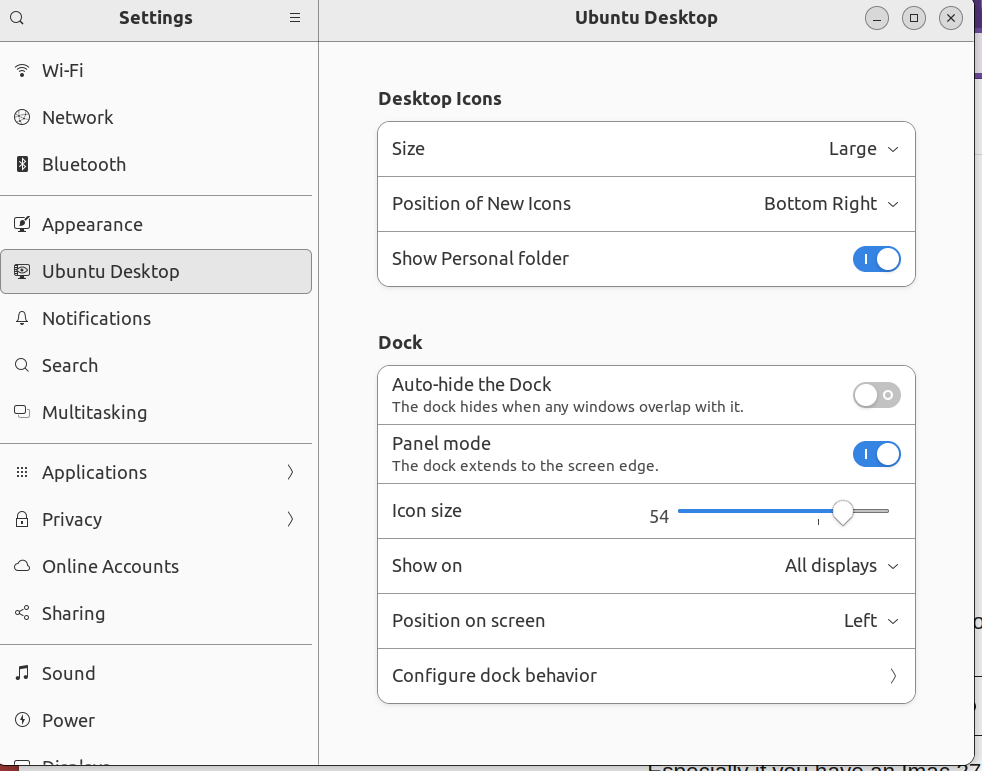
Now you want it to be accessible directly on your desktop like this:
Go to “Ubuntu Software” again and install “Extension Manager” (In German “Erweiterungs Manager”) Run it and Install “Applications Menu”
After the activation you’ll see the applications (In German “Anwendungen”) in the left corner on your screen
With “Main Menu/ Hauptmenü” you can see all the programs that are accesible. You can add new menus/items-
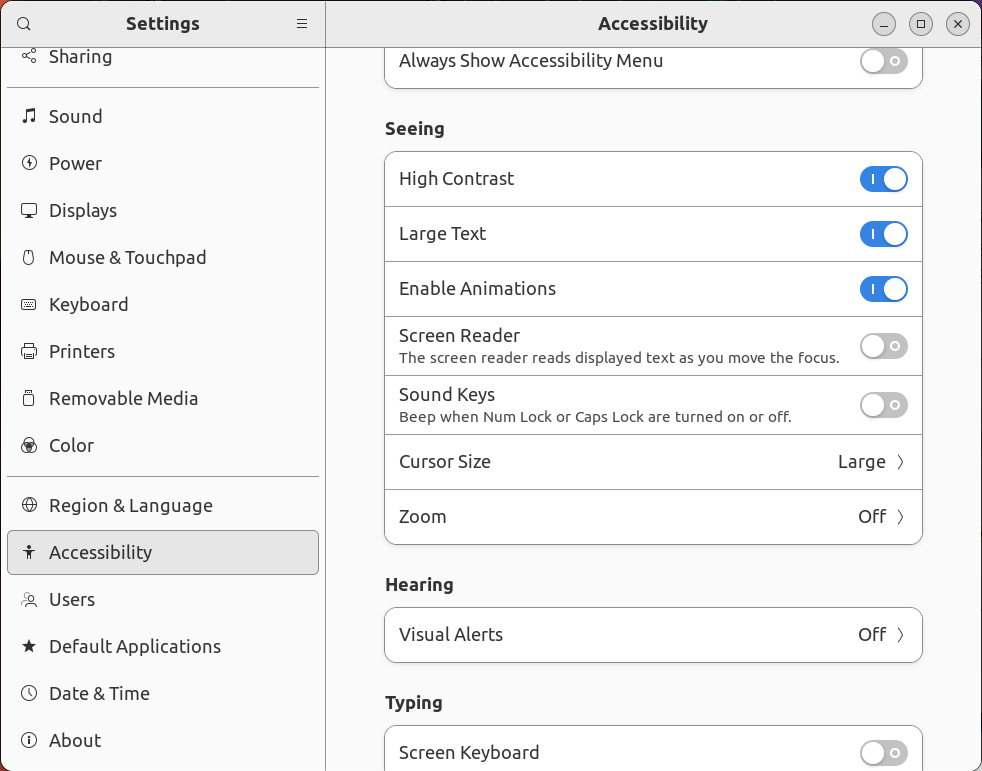
How to improve the visibility and Accessibility
Especially if you have an Imac 27 it can be important to improve the accessibilty. My recommendation/experience: activate High Contrast and Large Text, and make the Icons slightly bigger.
How to add Jetbrains programs
It is easily possible to add Jetbrains programs to the Linux system, here you can: create command-line launcher create desktop entry
In all Jetbrains programs there is a menu item “tools”.
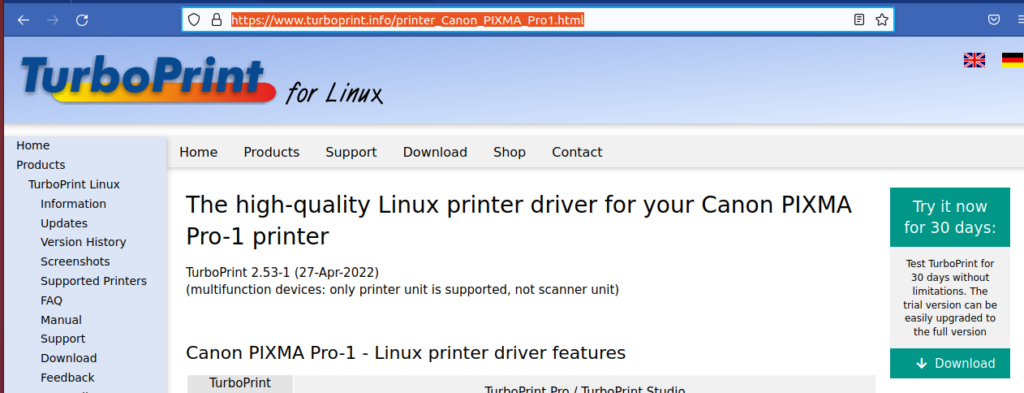
How to add a printer
Normally you won’t have a problem to add a printer. But if you need to install a special printer like “Canon Pro” you have to install special software (printer driver) for Linux. I recommend TurboPrint
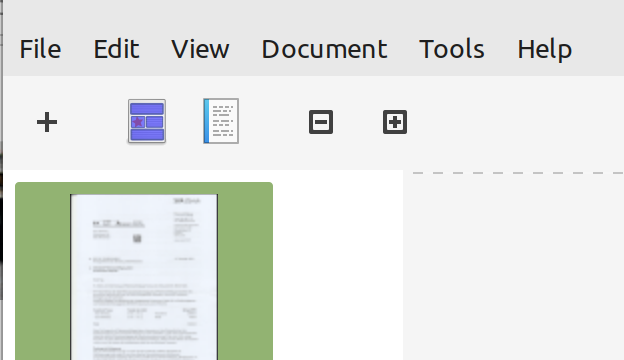
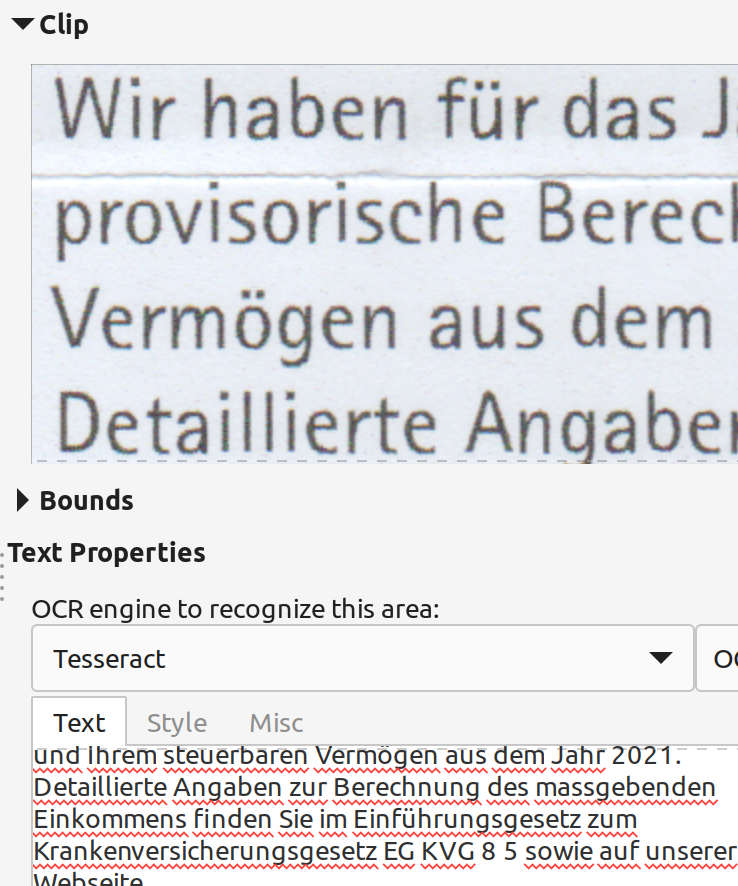
We all have this problem once in a while: there is a German document (in PDF or as an image) and we have to translate it in English (or Chinese if you like). Of course we use Google Translate! But how do we manage to get our text out of the PDF? There are some solutions: you could buy a program for that (Master PDF is very good), or, again, you can have it for free! All you have to do is to install 2 packages: “Tesseract OCR” and “OCR Feeder”. Tip: Install the complete Tesseract OCR with all languages. “OCR Feeder” is easy to understand (don’t use gImageReader: hard to understand) You can use OCR Feeder and scan your document directly, after the scanning is complete you can do the recognition: Document->Recognize document
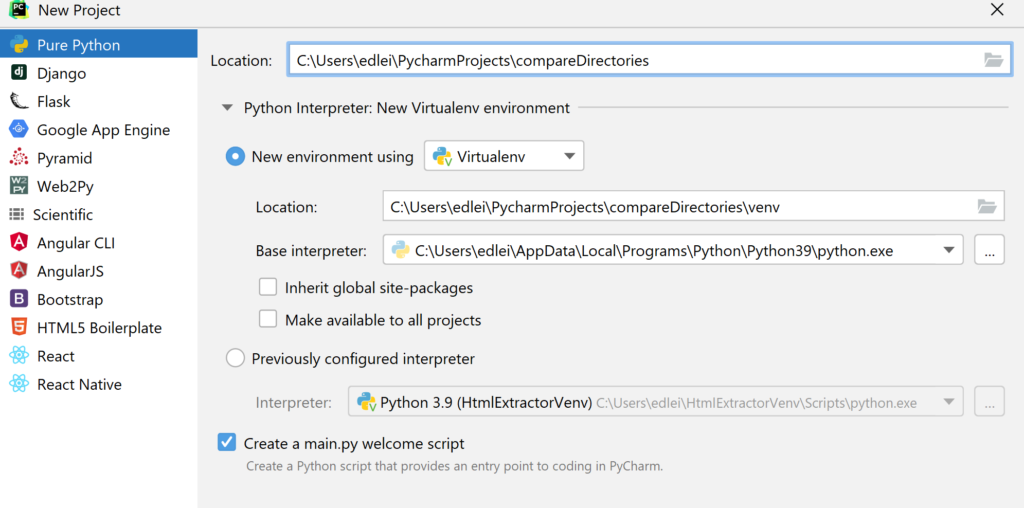
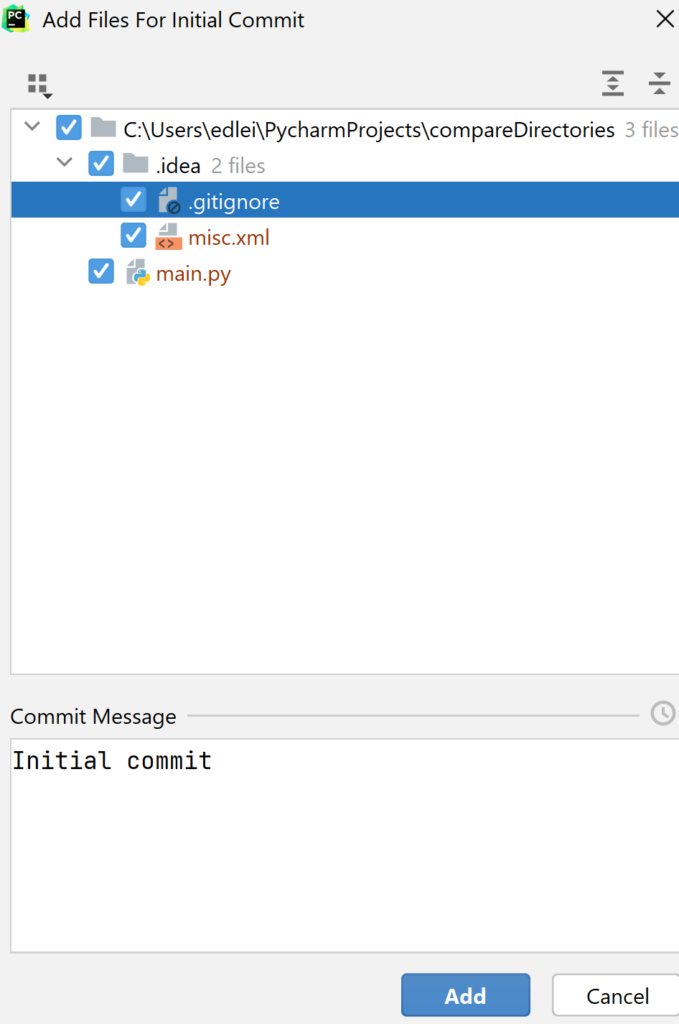
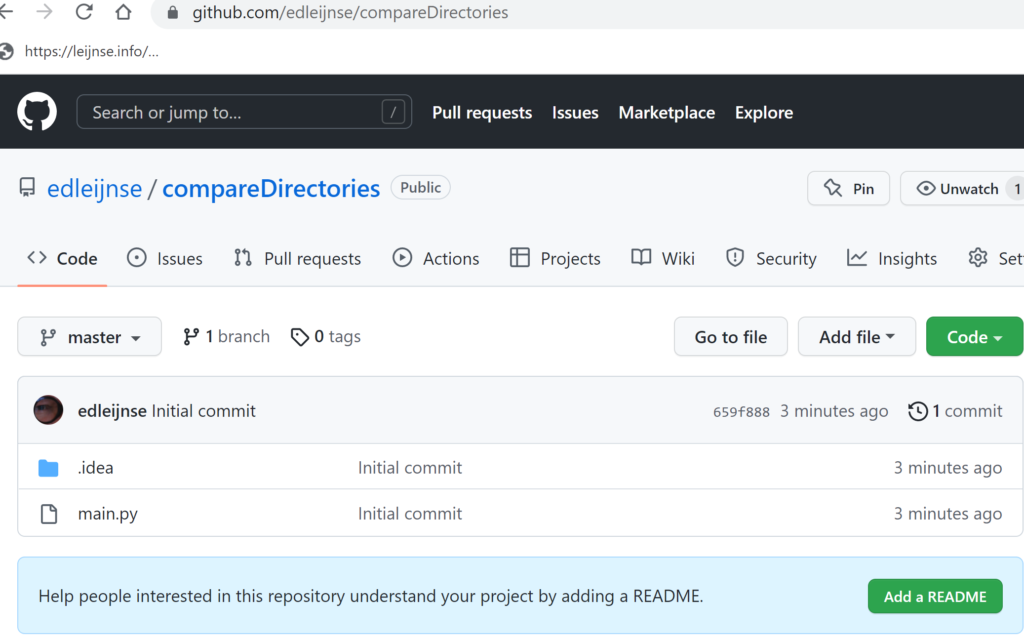
In this project I’ll show you how to compare directories, save the result, and process the result: all combined in one attractive GUI.
The first thing we’ll do: we have to find the right tools/methods in Python: so I’ve googled on “python compare directories” and found this one on the official documentation:
fromfilecmpimport dircmp
def print_diff_files(dcmp):
for name in dcmp.diff_files:
print("diff_file %s found in %s and %s" % (name, dcmp.left,
dcmp.right))
for sub_dcmp in dcmp.subdirs.values():
print_diff_files(sub_dcmp)
dcmp = dircmp('dir1', 'dir2')
print_diff_files(dcmp)
I’ve changed the code like this:
def print_diff_files(dcmp):
    common_files = sorted(dcmp.common_files)
    for name in common_files:
        print("common_file %s found in %s and %s" % (name, dcmp.left,
              dcmp.right))
    left_only_files = sorted(dcmp.left_only)
    for name in left_only_files:
        print("left_only_file %s found in %s" % (name, dcmp.left))
    right_only_files = sorted(dcmp.right_only)
    for name in right_only_files:
        print("right_only_file %s found in %s " % (name, dcmp.left))
    for sub_dcmp in dcmp.subdirs.values():
        print_diff_files(sub_dcmp)
What is really amazing to me is the sheer amount of information you’ll get from this compare method: try to experiment with it in debug mode and you’ll see what I mean.
Start with the GUI first
We’ll build a very simple GUI to choose both directories. Afterward we’ll add an action to it. As a base project we will use this one: https://github.com/edleijnse/pythonGui
You’ll find the gui part in TaggerBizControlCentre.py
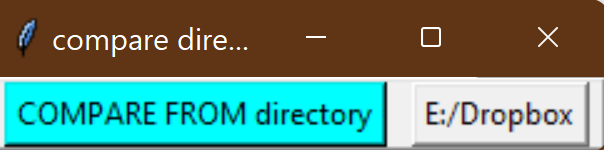
Now I’ve made a first button “compare from”:
self.btn_compare_from_dir = tk.Button(self.fr_buttons, text="COMPARE FROM directory",
                                      command=compareFromClicked, highlightbackground="cyan", bg="cyan")
While defining the button you can add a command to it, in this case: “compareFromClicked”. In the command you can define what happens after you clicked the button.
def compareFromClicked():
    print("compare from clicked")
    mydir = open_directory(self.filearray[0], "directory to compare from")
    btn_compare_from_dir_txt_var.set(mydir)
    self.filearray[0]=mydir
The programmed action is like this: the program will ask you where to find the directory and store the value in 2 variabels: the first “btn_compare_from_dir_txt_var” is displayed as a label field right from the button. the second “self.filearray” is used to save the chosen directory.
In the same style I’ve added a “compare_to” button. And I’ve added 2 methods for saving and reading the data in a file called